|
Original unique new year cards 2015, promotional paper models atv quad as a corporate gift. |
|||
|
Papírová čtyřkolka
-
Jak ji finančně využít |
|||
 |
|||
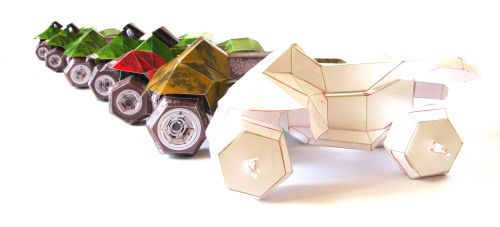
Creating and developing the modelThe complete development lasted more than 4 months. What started as an evening entertainment, soon became a full time job which occupied about 5 hours a day. Hard to believe? Lets have a closer look.
On the other hand, when you develop the model manually with the real paper, and every join has to be assembled many times over and over in many different ways to choose the best one, the result is very entertaining and intuitive to assemble.
For a while I experimented with bended parts reminding rounded spinwheel (air vessel), which looked very impressive, but too futuristic and not very quad like. But why to invent something what has been already many times invented. I found my inspiration on internet, which resulted in regullar hexagon with skewed edges. This kind of wheel was as chubby as I wanted. But it still missed something. The wheel needed a adeeper wheeldisc. There were many ways to do it but as the most efective appeared to be just one. To add the wheeldisc from inside, so that outside would remain everything smooth. Though this feature involved some problems with connection to the axle. So I redesigned the whole system of wheel assembling which then remained open all the time and in the end you only clap the a with disc inside.
It souds easy, but when you consider that even the single wheel consists of more than 100 different lines, there was really enough work to deal with. When I get to the graphical assembling manual, the mentioned absence of 3D programm provided another disadvantage. I soon gave up trying to take photos of each part, because I really could not set the same shooting angle for every part. So I manually retraced outlines of each part from the assembled model and It at least looked like a sophisticated 3D model. Confounded textures In addition the shape of the model did not fit any real quad. And the main problem is a simple fact, that I would have to dissassemble a real quad to take some pictures, because its parts are overlaying and partly covering each other. In the end everything was solved somehow except one thing. Again the wheel. You can not take a picture of rounded things and put it on flat surfaces. That is why the tyre had to be completely retouched and I am really proud of the result. If you would cut it and assembled it with tenths milimeter precision, each stump on the tyre would smoothly link to each other. However in practise it is very hard to achieve. But the wheel will look good even when your scissors or hand would mislead a bit.
|
|
||
|
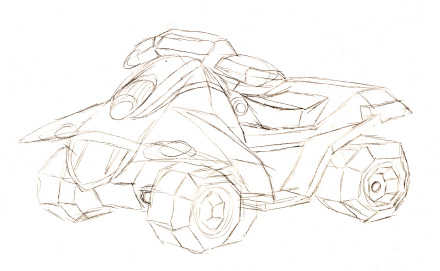
Sketch created after
the difficulties with wheels.
It slowly gains its future shape. |
|||
 |
|||
|
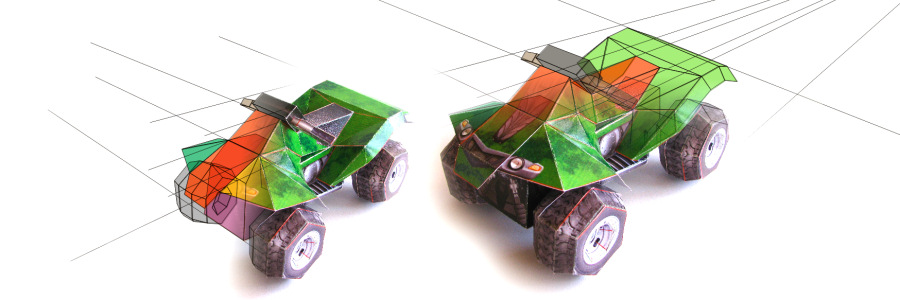
In the front - the right
shape of a wheel but with wrong system of assmebling. Behing it - continual
perfection of the wheel nave.
|
|||
 |
|||
|
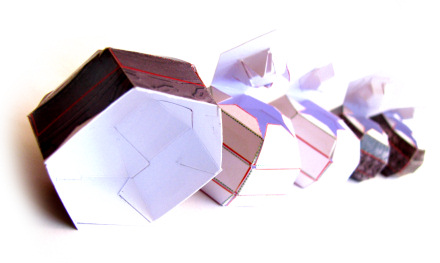
Reverse retracing of
the real model into the computer so that clear graphical assembling
instrucitons could be made. You can notice that textures are not the
final ones.
|
|||
 |
|||
|
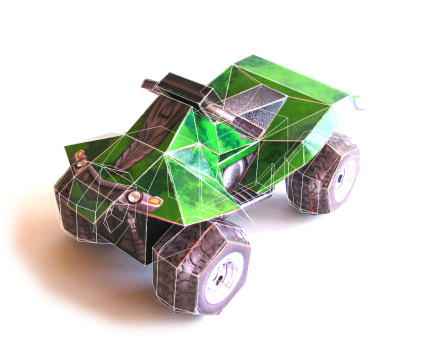
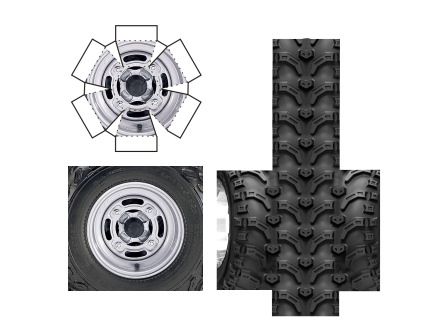
You really can not take
a picture of the pattern on the oval tyres. For that reason the texture
had to be completely retouched to get a straight pattern suitable for
paper model.
|
|||
 |
|||